Intro
Project for the Web is collaborative by design and allows all licensed team members full access to the entire project. In this blog post, you will learn how to limit some of these collaborative aspects to have more control over your projects, such as who can delete projects.
To do so, you can use a Microsoft Dataverse plug-ins to disable the delete operation on projects for a user based on any condition that you define when writing the plug-in. In this example, we will be removing the delete permission from a user that is not in a specific Team in Dataverse. Dataverse Teams can be backed by a Microsoft 365 Group or created manually.
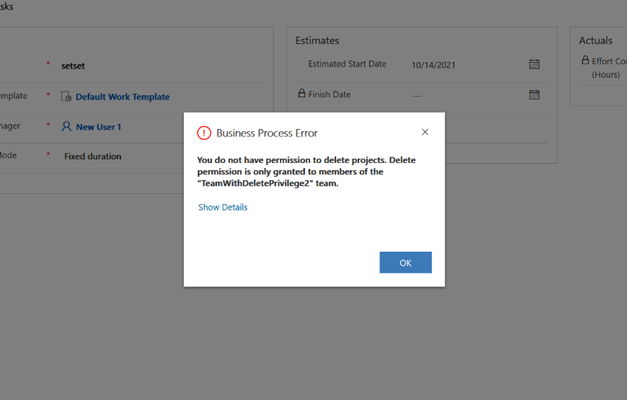
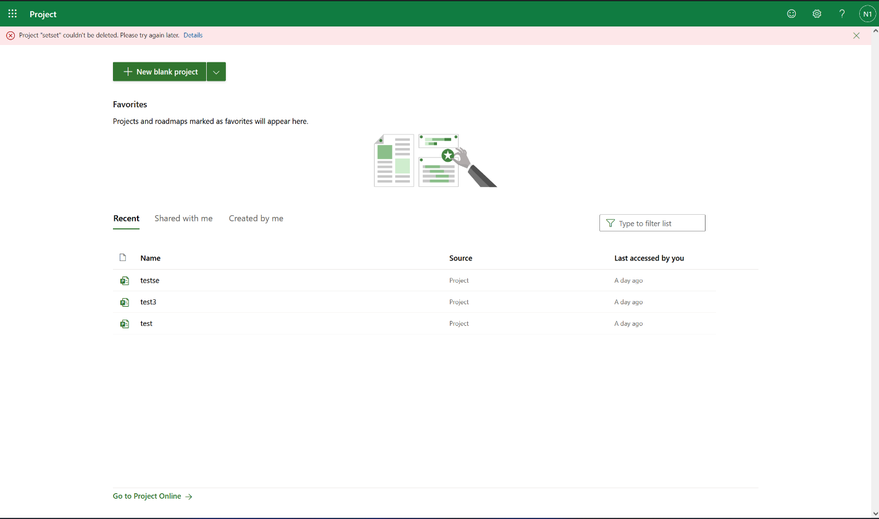
When using this plug-in, the user without delete permission will see the following custom errors when trying to delete a project in Project in Power Apps:
Similarly, the user will not be able to delete a project in Project for the Web, and the same plug-in logic can also be used in Dynamics 365 Project Operations.
You can modify the behavior of this plugin as you wish to grant the delete permission solely to the project owner, manager, an Admin, or otherwise. Furthermore, Dataverse plug-ins can be used to validate or modify any other operation that is performed on Dataverse Entities (Projects, Tasks, Teams, etc.) and their relationship to other Entities. To read more about what is possible, please see the official Dataverse Plug-in Documentation.
Note: You need to have Administrator level access to a Microsoft Dataverse environment to register a Plug-in for your environment.
How to build a Dataverse plug-in from scratch for Project for the Web
Prerequisites:
- Official documentation for Dataverse plug-in Prerequisites.
Creating a new Dataverse plug-in in Visual Studio
Please visit the Official documentation to Write a Dataverse Plug-in for latest updates. A step-by step is provided below for convenience.
- Launch Visual Studio (2019 in this example)
- Select Create a new Project.
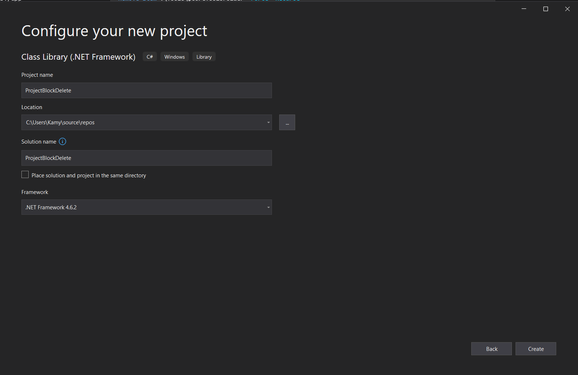
- Choose the Class Library (.NET Framework) templates and press Next.
4. Name the Project, choose the .NET Framework 4.6.2, and press Create.
5. Rename the Class in your project solution for clarity. In this example, we name it ProjectBlockDeletePlugin.cs.
6. We need some additional NuGet Packages.
- In the top toolbar, got to Tools > NuGetPackageManager > Manage NuGet Packages for Solutions
- Go to the Browse tab, and search for Microsoft.CrmSdk.CoreAssemblies. Install the latest stable version for your project.
7. Go back to the class file and copy paste the following class code: Project-Dataverse-Plugin-Sample/ProjectBlockDeletePlugin.cs at main · OfficeDev/Project-Dataverse-Plugin-Sample (github.com)
- Make sure that your class is public and has the same name that you gave your class file.
- IMPORTANT: In the code where marked TODO, you need to manually enter the Team Id give delete privileges to. You can find these in PowerApps Data Explorer.
Description of the code
In this example, we’re creating a Pre-Validation plug-in, which runs when an operation (Delete) is called on the Dataverse Entity (Project). These are settings that are later set in the Plug-in Registration tool. When the plug-in launches, we capture the context of the plug-in, which includes the ID of the User who initiated the plug-in by performing the Delete operation on a project in Project in Power Apps or Project for the Web. We then pull the teams that the user has relationships with from Dataverse and verify if any of these teams have the same ID as the team that we want to have Delete privilege. If not, we throw an exception, and the Delete operation is canceled. For more context and documentation on what you can do with Dataverse Plug-ins, please visit the Official Dataverse Plug-In Documentation.
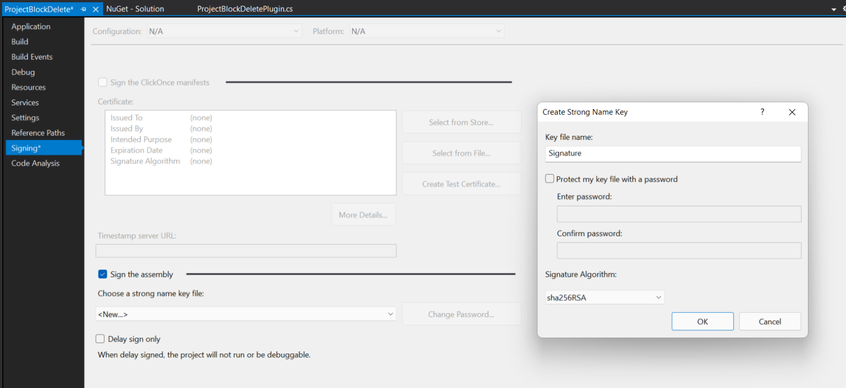
8. Sign the Assembly:
- Right click the project in your Solution Explorer and press Properties.
- Go to the Signing tab, check Sign the assembly, Choose <New…> from the dropdown options and name your signature. Password is optional.
9. Build your solution by right clicking the project in your Solution Explorer and pressing Build.
Register your Dataverse Plug-in
10. Launch the Plugin Registration Tool (installed in Prerequisites)
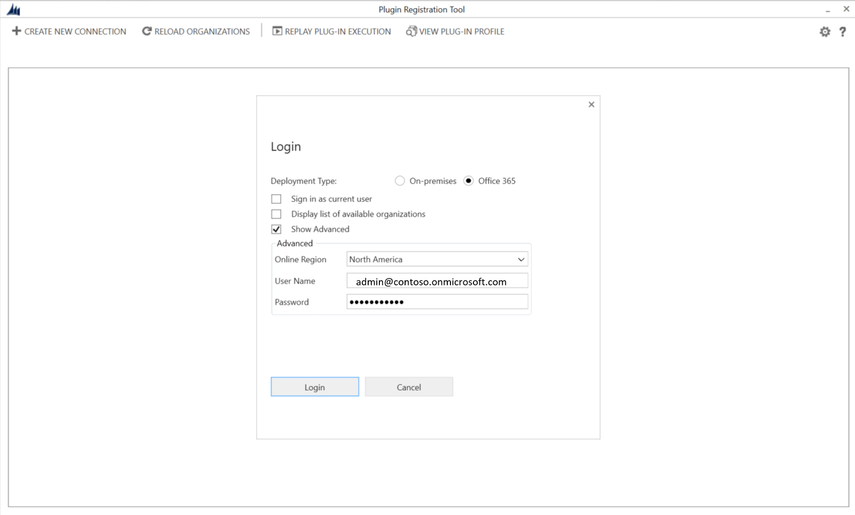
11. Press the Create New Connection button at the top left and enter the account from which you want to register the plug-in to Dataverse.
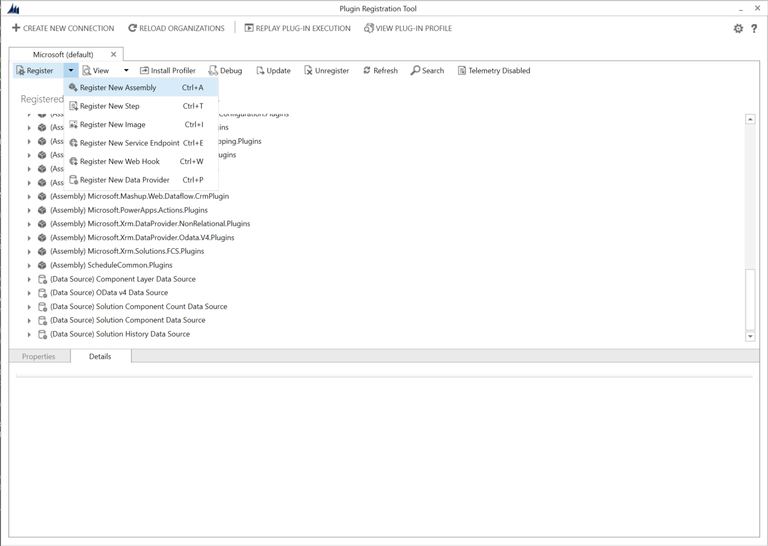
12. Register a new assembly
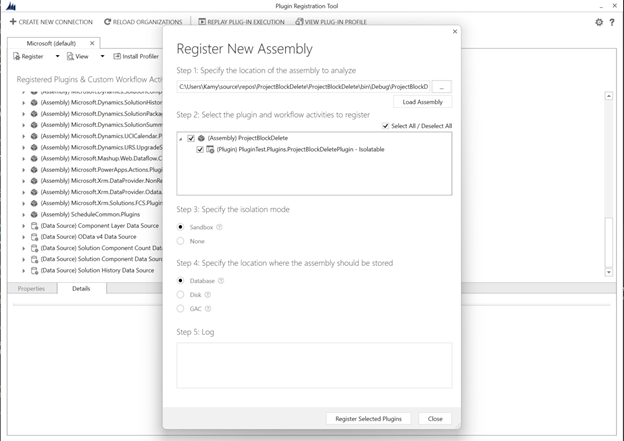
13. Load the assembly from the .dll previously built, which is stored in your project’s Debug folder.
14. Press Register Selected Plugins.
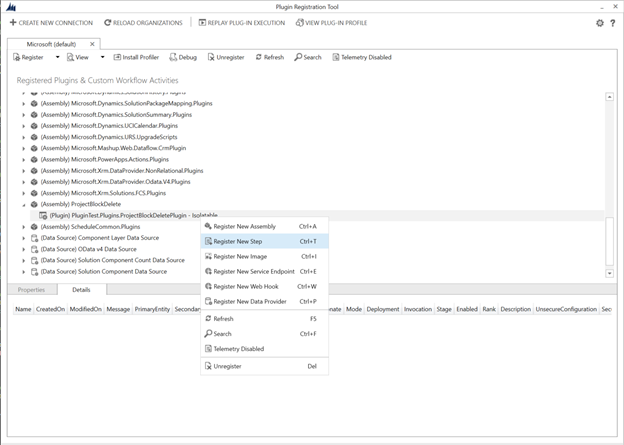
15. Find your Plugin Assembly in the list of Registered Plugins and right click to Register a new Step:
16. Register the Pre-Validation Step as such so that the Plug-in runs when a Delete operation is executed on a Project (msdyn_project) Entity:
17. We’re done! You can now test manually to verify functionality. Expected behavior when the user isn’t in a team with delete privileges:
- In Project in Power Apps:
- In Project for the Web (error message at the top):
Next Steps
This was one of the many examples of extensions that you can add to Project’s functionality using Dataverse Plug-ins. Feel free to play around with other Entity Operations, such as automatically creating tasks when a new Project is created, blocking users from deleting certain tasks, and much more. For more examples, visit the Official Dataverse Plug-In Documentation.
Posted at https://sl.advdat.com/2Y7lDXp