This article demonstrates how to deploy to Azure Static Web Apps using GitLab.
In this tutorial, you learn to:
- Set up an Azure Static Web Apps site for a Vanilla Basic app.
- Create an GitLab Pipeline to build and publish a static web app via Azure portal.
Prerequisites
- Active Azure account: If you don't have one, you can create an account for free.
- GitLab project: If you don't have one, you can create a project for free.
- You’ll need to validate your account with a credit card. This is required to discourage and reduce abuse on GitLab infrastructure.
Create a repository in GitLab
- Navigate to your repository in GitLab Repos.
- Go to create new project page.
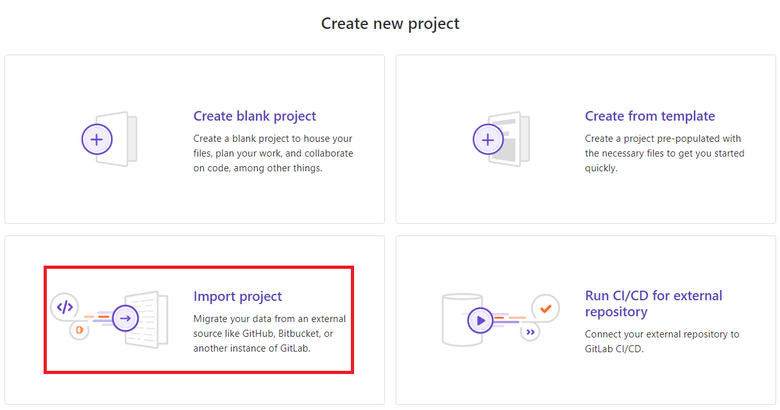
- Click on Import Project.
Creation of new project using import method
- Click on Repo by URL.
- In Git repository URL, enter “https://github.com/staticwebdev/vanilla-basic.git”.
Importing project using Repo by URL
- Select Create project.
Create a static web app
- Navigate to the Azure portal.
- Select Create a Resource.
- Search for Static Web Apps.
- Select Static Web Apps.
- Select Create.
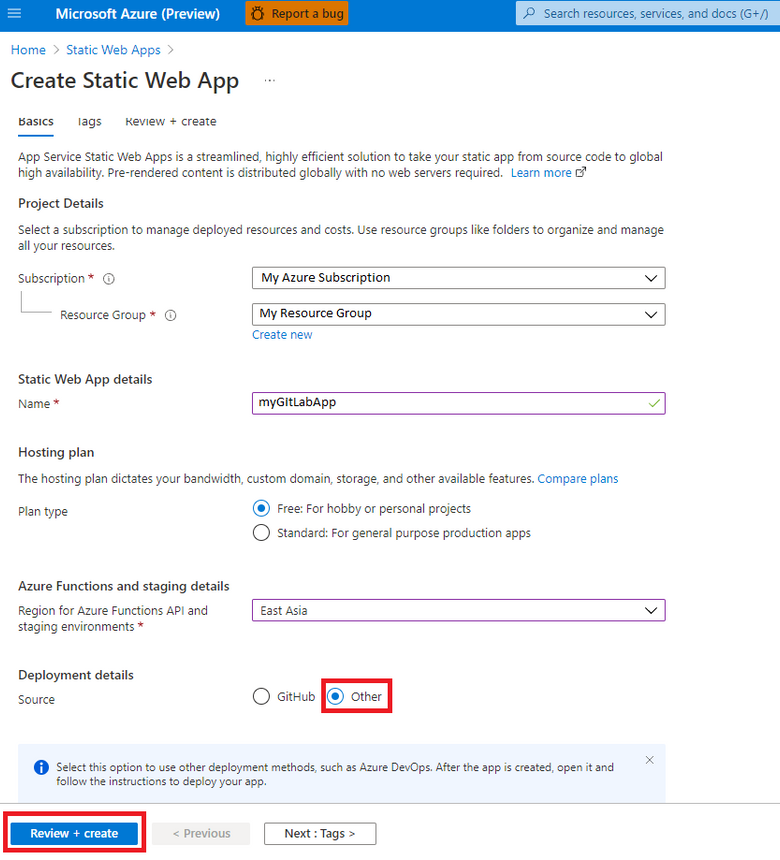
- Create a new static web app with the following values.
|
Setting |
Value |
|
Subscription |
Your Azure subscription name. |
|
Resource Group |
Select an existing group name or create a new one. |
|
Name |
Enter myGitLabApp. |
|
Hosting plan type |
Select Free. |
|
Region |
Select a region closest to you. |
|
Source |
Select Other. |
Static Web App resource creation
*Note: This is just an example.
- Select Review + create
- Select Create.
- Once the deployment is successful, select Go to resource.
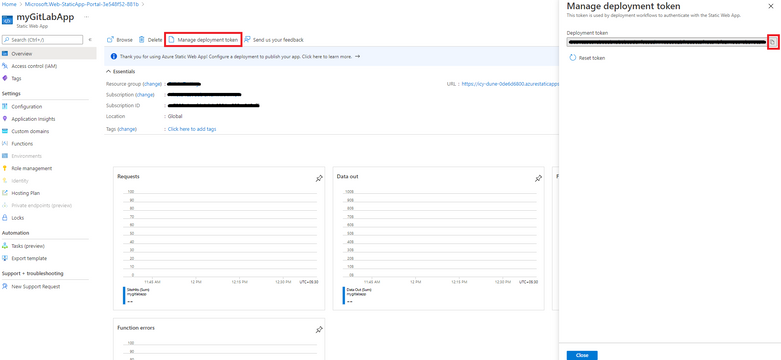
- Select Manage deployment token.
- Copy the deployment token and paste the deployment token value into a text editor for use in another screen.
Copying deployment token from Static Web App resource
Create the Pipeline Task in GitLab
- Navigate to the repository in GitLab that was created earlier.
- Select Settings.
- Select CI/CD.
- Select Expand Variable sub-section.
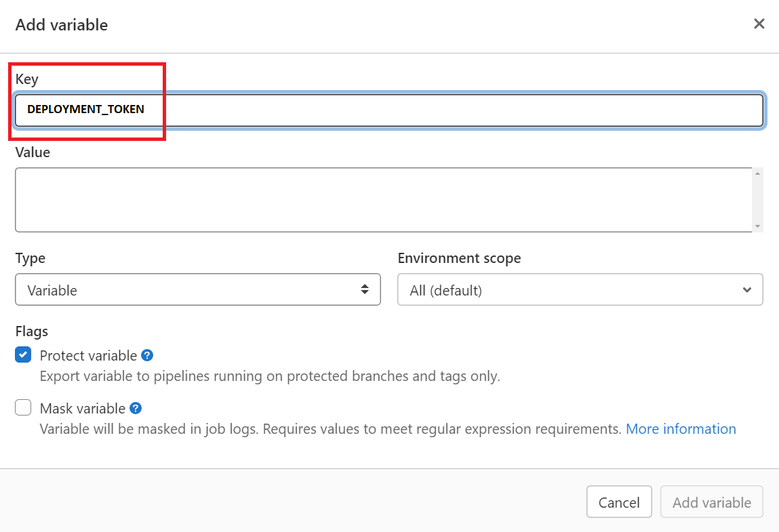
- Select Add variable.
Adding Deployment Token in project CI/CD variable section
- Write DEPLOYMENT_TOKEN in Key section.
- Copy the deployment token in Value section that you previously pasted into a text editor.
- Create a new file .gitlab-ci.yml. at the root directory.
- Copy the following YAML in .gitlab-ci.yml file and the select commit.
variables:
  API_TOKEN: $DEPLOYMENT_TOKEN
  APP_PATH: '$CI_PROJECT_DIR/src'

deploy:
  stage: deploy
  image: registry.gitlab.com/static-web-apps/azure-static-web-apps-deploy
  script:
    - echo "App deployed successfully."
*Note: $CI_PROJECT_DIR is the full path the repository is cloned to, and where the job runs from.
Note:
If you are not using sample app, the values for APP_PATH, API_PATH and OUTPUT_PATH need to change to match the values in your application.
|
Property |
Description |
Example |
Required |
|
APP_PATH |
Location of your application code. |
Enter $CI_PROJECT_DIR/ if your application source code is at the root of the repository, or $CI_PROJECT_DIR /app if your application code is in a directory called app. |
Yes |
|
API_PATH |
Location of your Azure Functions code. |
Enter $CI_PROJECT_DIR /api if your app code is in a folder called api. |
No |
|
OUTPUT_PATH |
Location of the build output directory relative to the APP_PATH. |
If your application source code is located at $CI_PROJECT_DIR /app, and the build script outputs files to the $CI_PROJECT_DIR /app/build folder, then set build as the OUTPUT_PATH value. |
No |
|
API_TOKEN |
API token for deployment |
Include API_TOKEN: $DEPLOYMENT_TOKEN |
Yes |
- Select commit.
- Once the deployment is successful, navigate to the Azure Static Web Apps Overview which includes links to the deployment configuration. Note how the Source link now points to the GitLab.
- Select the URL to see your newly deployed website.
URL for newly deployed app
Clean up resources
Clean up the resources you deployed by deleting the resource group.
- From the Azure portal, select Resource group from the left menu.
- Enter the resource group name in the Filter by name field.
- Select the resource group name you used in this tutorial.
- Select Delete resource group from the top menu.
Additional Resources
- If you need help getting started with Pipelines, see Create your first pipeline.
- If you need reference to help you with writing pipeline, see Reference for .gitlab-ci-yml file.


