Hi,
my Name is Christian Kielhorn, and I’m a Senior Customer Engineer – formerly known as Premier Field Engineer – within Germanys Customer Success Organization for Modern Work.
Today I’d like to come back to a customer’s question – as the customer asked me how to join a Windows 10 (or Windows 11) Client automatically to AzureAD – as like as we did before with the Domain Join.
Well, honestly, I thought – cool, only 5 minutes to go, but it wasn’t. It isn’t like doing a Domain Join with Username and Password – it is more or less using a so-called bulk enrollment token (BPRT).
My fellow Colleague @Anders Ahl wrote an article - Bulk join a Windows device to Azure AD and Microsoft Endpoint Manager using a provisioning package - Microsoft Tech Community – and decided to work with the Windows Configuration Designer (I copied and modified also the current state part).
There is only one thing – the user you are enrolling with this it is the same user you are logged in ot registered within the Azure AD Login Page from WCD (first time) – and not even a service user as many companies would like to.
And rather than doing stuff like logoff / logon or disconnect and delete the WCD WebApp registration within AzureAD or something like this I was on my way to find an alternative – something with PowerShell and found something in 3rd Party PowerShell Module named AADInternals.
We can also use PowerShell natively, yes, and it does need only some more PowerShell Cmdlets, how to create the appropriate Rest methods, but doing it as easy as possible- I decided to use the AADInternals (for a more detailed view – have a look into the PRT.ps1 of AADInternals).
At this point I have to say that we as Microsoft cannot guarantee the consistency of 3rd Party Scripts we are referring to, it is an approach for today and we will not take over any kind of responsibility using this 3rd Party Modules.
If you do have some questions regarding the module itself, kindly ask the developer or have a look into the source code (yes, it is available under: GitHub – Gerenios/AADInternals: AADInternals PowerShell module for administering Azure AD and Office 365)
Current state:
CONTOSO.COM has hundreds of Kiosk Devices within the company’s lobbies or Microsoft Teams Rooms devices in their Meeting rooms running Windows 10. These machines are not Active Directory joined today and the IT Pro decided: they should not.
Desired state:
All these devices should be joined to Azure Active Directory and enrolled into Intune.
Process:
The goal is to Azure AD join these machines and enroll them into Intune using a provisioning package. The IT Pro tasked with the job has read through the Microsoft Docs article Bulk enrollment for Windows devices but doesn’t like the requirement to rename the device as all devices are already conforming to the established naming standard.
Automatic MDM enrollment to Intune is enabled for all Azure AD joined machines. If this is not the configuration you use in your tenant you would simply end up with an Azure AD joined device, without Intune management after applying the provisioning package. There is nothing in the provisioning package itself that will address the MDM enrollment, it’s all automatically taken care of by Azure AD.
Prerequisites
Start an administrative PowerShell and change the execution policy (for this moment / process only) to install the AAD Internals PowerShell Module:
Set-ExecutionPolicy -ExecutionPolicy RemoteSigned -Scope Process
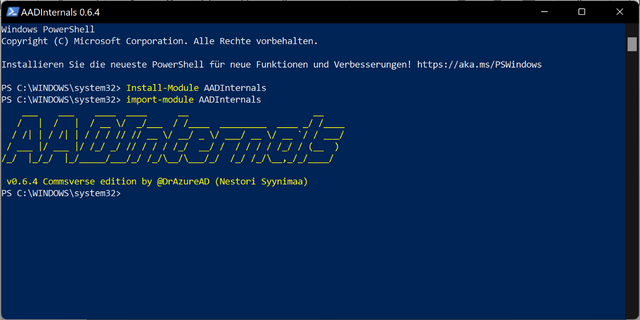
Install-Module AADInternals
Import-Module AADInternals
The module is now ready and after typing in:
Get-AADIntAccessTokenForAADGraph -SaveToCache
An authentication window appears and as requested you should login with your service account name and it's appropriate password:
After typing in the password to its page, we do have a result:
Let's check the cache:
Get-AADIntCache
Confused about the Client ID? The Client Application does the trick – AADInternals uses the ClientID “1b730954-1685-4b74-9bfd-dac224a7b894” and asks either for authentication or uses the cached token.
In addition there are well-known client application IDs, and a small spreadsheet with some selected examples – copied from my tenant, but you can review and compare it with your own Enterprise Application Tab: Enterprise applications - Microsoft Azure
|
Client App |
Client ID |
Resource |
|
MS Graph API |
1b730954-1685-4b74-9bfd-dac224a7b894 |
graph_api |
|
MS Exchange Remote PowerShell |
a0c73c16-a7e3-4564-9a95-2bdf47383716 |
exo |
|
Exchange Online |
00000002-0000-0ff1-ce00-000000000000 |
o365exo |
|
SharePoint Online |
00000003-0000-0ff1-ce00-000000000000 |
o365spo |
|
MS Teams |
1fec8e78-bce4-4aaf-ab1b-5451cc387264 |
teams |
|
Microsoft Support and Recovery Assistant (SARA) |
d3590ed6-52b3-4102-aeff-aad2292ab01c |
sara |
|
OneDrive Sync Engine |
ab9b8c07-8f02-4f72-87fa-80105867a763 |
onedrive |
|
Windows Configuration Designer (WCD) |
de0853a1-ab20-47bd-990b-71ad5077ac7b |
|
|
Skype for Business online |
00000004-0000-0ff1-ce00-000000000000 |
|
|
Microsoft Intune |
0000000a-0000-0000-c000-000000000000 |
|
As far as you can see, Intune is also an Enterprise Application within Azure as well as the Windows Configuration Designer from ADK (where Anders connected through for his blog post to get his Token).
Successfully and tested - so let's start over with a token and the resource identifier:
Get-AADIntAccessTokenForAADGraph -Resource urn:ms-drs:enterpriseregistration.windows.net -SaveToCache
You will be asked for username and password - and the result should look like:
Once we want to acquire a Bulk Enrollment Token, we must type in:
$bprt = New-AADIntBulkPRTToken -Name "svc_dem@CONTOSO.COM"
The Token has an expiration time from now to 180 days – which is also the maximum, so every 180 days you should rework this package.
If you do want to have a shorter date, maybe from now to 90 days, it can be realized with:
$bprt = New-AADIntBulkPRTToken -Name "svc_dem@CONTOSO.COM" -Expires ((get-date).AddDays(90).date)
Once it was successfully fired, we will get a result as like as:
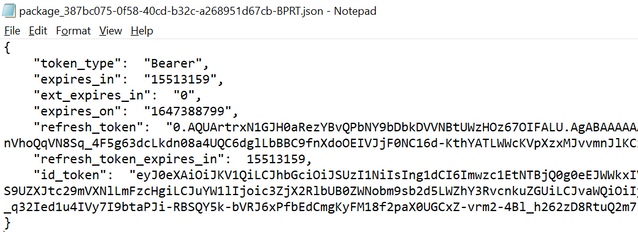
Open that .json file, and it will look like:
Copy the content from refresh_token without double quotes to your clipboard – now we are ready to proceed with the Windows Configuration Designer and it’s provisioning package.
And yes, we can do it using PowerShell as well:
(get-content .\package_387bc075-0f58-40cd-b32c-a268951d67cb-BPRT.json | ConvertFrom-json).refresh_token
Okay, now we retrieved the refresh token and now?
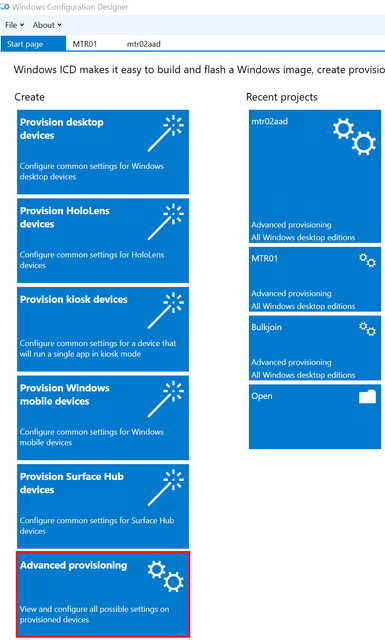
We will create a provisioning package using the Windows Configuration Designer:
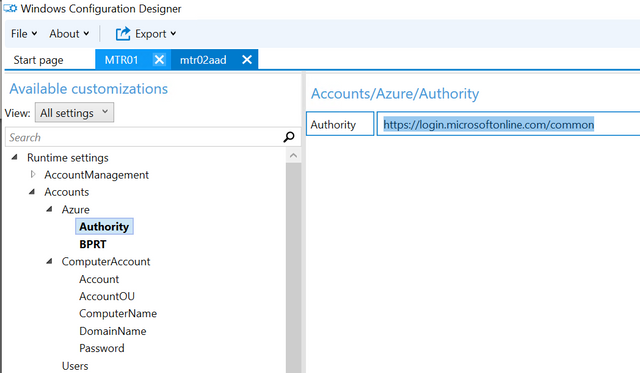
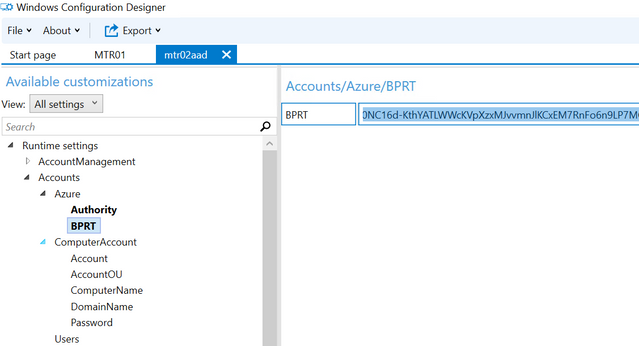
From the advanced view select the category Accounts / Azure
The copied refresh token needs to be pasted in from the clipboard to the BPRT field:
Anders created from scratch using the Wizard, and there were two options inside we should set to because in my lab I had some errors joining the device to AzureAD automatically were as I forgot to set these settings:
Once it is the HideOobe Option to TRUE and AllowAllTrustedApps to TRUE as well. That’s it. (Disabling Cortana is only for testing purposes for me)
Now export it via the menu as a provisioning package (for testing purposes as uncrypted package only) and implement it to your deployment process like MDT:
- First, copy the content of the export to your deployment share – for the first attempts I selected my deploymentshare/script directory (which will be referred as %scriptroot% within MDT Deployment) and created an subdir named “PPKG”
- Add a “Run Command line” Step with the command:
DISM.exe /Image=%OSDISK% /Add-ProvisioningPackage /PackagePath:%SCRIPTROOT%\PPKG\mtr02aad.ppkg
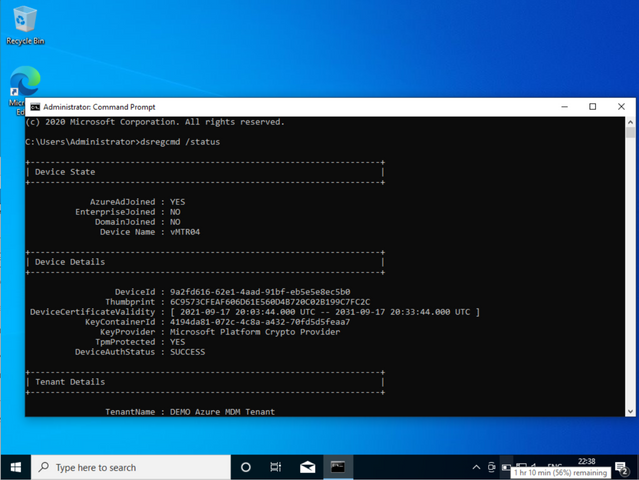
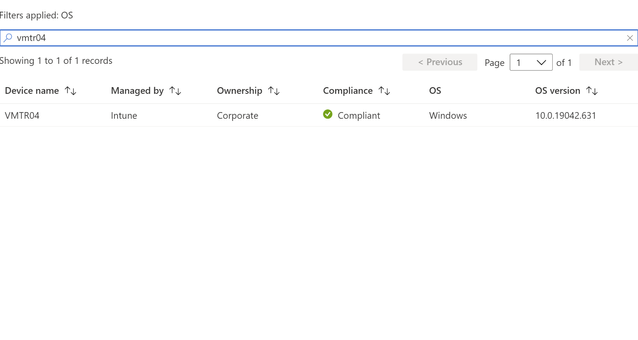
After a successful deployment the device joined itself to Azure using my token and assigned the ownership to my SVC_DEM Account (which is a normal user account with the special Device Enrollment Manager Role) – it enrolls also in Intune successfully:
Afterall, I put it into my favorite PowerShell App Deployment Toolkit (my personal recommended wrapping tool to get applications usable for MDT, SCCM and Intune as well) and created an application to be deployed within my MDT.
Within the deploy-application.ps1 I am using the following command:
Install-ProvisioningPackage -PackagePath "$dirfiles\mtr02aad.ppkg" -ForceInstall -QuietInstall -Verbose
And for uninstallation purposes:
Uninstall-ProvisioningPackage -PackageId ((Get-ProvisioningPackage | where {$_.packagename -eq "mtr02aad"}).PackageID.GUID)
Now I have an application I am able to distribute within my choice of deployment tools and ready to go.
And the Result:
Happy bulk deploying ![]()
